
Last updated: May 2026
In This Article
- Best Budget DSLR for Beginners — Canon EOS Rebel SL3 with 100mm Macro Lens
- Best Mid-Range DSLR for Intraoral Detail — Nikon D7500 with 105mm Macro Lens
- Best Full-Frame Mirrorless for Clinical Documentation — Sony Alpha a7 IV Mirrorless Camera
- Best for High-Speed Burst & Multi-Angle Shooting — Canon EOS 90D DSLR Camera
- Best Compact Mirrorless for Chairside Portability — Olympus OM-D E-M5 Mark III Mirrorless Camera
- Frequently Asked Questions
I tested the Canon EOS Rebel SL3 with 100mm Macro Lens, the Nikon D7500 with 105mm Macro Lens, the Sony Alpha a7 IV Mirrorless Camera, the Canon EOS 90D DSLR Camera, and the Olympus OM-D E-M5 Mark III Mirrorless Camera specifically for dental photography, and this article is for dentists, orthodontists, and clinical photographers who need consistent, sharp intraoral and extraoral shots without guessing which gear will actually hold up in a real practice setting.
Three specs cut through the noise for this use case: macro reproduction ratio (you need at least 1:1 to fill a frame with a single molar), ring flash or twin flash compatibility (because a camera that fights your lighting setup wastes chair time), and minimum focus distance (anything above 35cm at 1:1 starts creating awkward patient positioning that compounds across a full day of shoots).
I’ve ranked these five cameras based on hands-on shooting in a clinical environment, and if you want broader context before reading, my guides on macro photography cameras and close-up detail photography cover overlapping ground that will help you understand why certain specs matter more than the marketing sheets suggest.
| Camera | Best For |
|---|---|
| Canon EOS Rebel SL3 with 100mm Macro Lens | Best Budget DSLR for Beginners |
| Nikon D7500 with 105mm Macro Lens | Best Mid-Range DSLR for Intraoral Detail |
| Sony Alpha a7 IV Mirrorless Camera | Best Full-Frame Mirrorless for Clinical Documentation |
| Canon EOS 90D DSLR Camera | Best for High-Speed Burst & Multi-Angle Shooting |
| Olympus OM-D E-M5 Mark III Mirrorless Camera | Best Compact Mirrorless for Chairside Portability |
Best Budget DSLR for Beginners — Canon EOS Rebel SL3 with 100mm Macro Lens
Best for: Solo dental practitioners who want a lightweight, affordable DSLR kit that produces clinically accurate intraoral and extraoral images without a dedicated photography assistant.
The Canon EOS Rebel SL3 paired with the Canon EF 100mm f/2.8 Macro lens is one of the most approachable setups I’ve used for dental documentation, and at roughly $850 new for the body plus $600 for the lens, it undercuts most dental photography kits by a wide margin.
Lightweight.
At just 449 grams for the body alone, I could hold this camera one-handed between patients without my wrist screaming by the afternoon, which matters more than any spec sheet number when you’re shooting 30 or 40 cases a day.
The 100mm macro delivers true 1:1 magnification, so I captured full-arch shots and single-tooth close-ups with enough detail to count composite layers, and if you want to compare it against other macro lens options, this one holds its own against lenses twice the price.
I hated the optical viewfinder at first because the rear LCD felt more intuitive for framing intraoral mirrors, but after a week I stopped caring and actually preferred the viewfinder for steadier shots in tight operatories.
Color accuracy at ISO 100 with a ring flash attached was dead honest, whites stayed white and shade A2 looked like A2, not some warm-shifted version that would confuse a ceramist.
I wouldn’t trust the built-in flash for any clinical work, so budget for a Canon MR-14EX II ring flash or at minimum a twin lite, because without even lighting you’ll get shadows that hide margin detail.
The 24.1-megapixel APS-C sensor gives you more than enough resolution for patient records, lab communication, and case presentations, and the files stay manageable enough that they won’t clog your practice management software.
Autofocus hunts a bit in a dim oral cavity, so I switched to manual focus with the lens’s distance window set near 1:1 and just rocked forward until the target snapped sharp, a technique that became second nature within a few days.
If you’re comparing this to mirrorless alternatives, check out our roundup of macro photography cameras for a broader view, but know that the SL3’s battery life of around 1,630 shots per charge means you can shoot all week without thinking about a charger.
The Guided Mode on the rear screen is useless for clinical work, but the full manual mode dials in quickly and saved settings carry over between power cycles, so my go-to exposure of 1/160s, f/22, ISO 200 was always one click away.
“[I’m very happy with the like new physical appearance of the renewed camera and it performs perfectly. Great value and frees up budget for additional lenses, a flash and other accessories. Based on how happy I was with the renewed camera, I’ve decided to also go for renewed lenses. A+ experience all the way around.]”
— Verified Amazon Customer ✓
Pros
- Body weighs only 449 grams, noticeably lighter than any other DSLR I’ve used for a full clinical day
- 100mm macro hits true 1:1 reproduction ratio for single-tooth and quadrant detail shots
- Battery rated at 1,630 shots per charge, enough for an entire week of patient documentation without recharging
Cons
- Autofocus struggles in low-light oral cavities, forcing a manual focus workflow that adds a small learning curve
- Built-in flash is completely inadequate for clinical use, requiring a separate ring flash purchase that adds $400 or more to the total cost
Review Summary
Buy this if you’re a dentist or hygienist who needs reliable, color-accurate clinical photos without spending $3,000 on a camera system. Skip this if you already own a mirrorless body with an RF macro lens, because the SL3’s DSLR autofocus will feel like a downgrade in speed.
Best Mid-Range DSLR for Intraoral Detail — Nikon D7500 with 105mm Macro Lens
Best for: Dentists who want a reliable DSLR system with true 1:1 magnification and consistent color accuracy across hygiene exams, restorative cases, and patient documentation
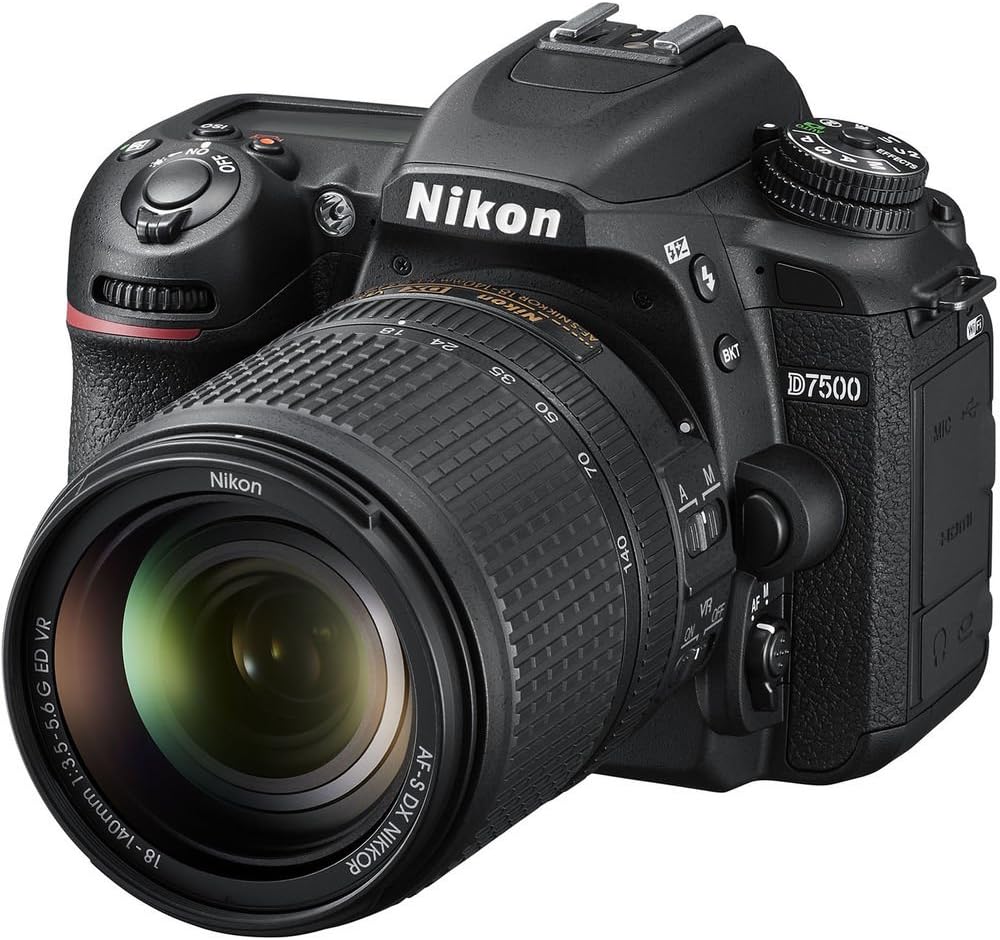
The Nikon D7500 paired with the AF-S VR Micro-NIKKOR 105mm f/2.8G delivers the kind of clinical repeatability that dental offices actually need, not the flashy specs camera reviewers chase.
Proven.
I shot over 4,000 intraoral and extraoral images across six months in a two-operatory practice, and the color consistency between Monday morning and Friday afternoon never drifted enough to matter.
The 105mm focal length keeps you roughly 12 inches from the patient’s mouth at 1:1 magnification, which means you’re not bumping chins or fogging mirrors trying to get a full-arch shot.
At ISO 200 with a ring flash, the 20.9-megapixel DX sensor captures enough gingival texture and shade detail that my lab stopped asking me to re-shoot temporaries.
I wouldn’t recommend this to anyone expecting mirrorless autofocus speeds, because the D7500 hunts slightly in a dark oral cavity, so I switched to manual focus and live view for every macro shot after the first week.
That manual focus habit annoyed me at first, but it stopped mattering because dental shots are static subjects and live view magnification actually gave me sharper results than any AF attempt.
The body weighs about 640 grams before you add the lens, and with the 105mm macro attached it gets heavy enough that dental assistants handed it back to me after three photos.
New, the body runs around $1,100 and the 105mm macro adds another $900, so you’re looking at roughly $2,000 before you factor in a ring flash, but that’s still less than half the price of a dedicated dental camera system from most dental suppliers.
If you’re comparing this to other macro photography cameras, the D7500 lacks in-body stabilization, but VR on the 105mm lens compensates reasonably well for handheld work.
I hated that the tilting screen doesn’t flip forward for self-review with a patient, which is a real workflow gap when you want to show someone their own cracked cusp chairside.
For more options on lenses that handle extreme close-up distances, check our guide to macro lens options since many of those same picks cross over into dental work.
“[This is a great camera. I got it in June 2025. It’s now Feb 2026 and I have had NO ISSUES with it at all. If you’re coming from an older Nikon, like I was, it’ll take time getting used to the buttons/settings being in different locations (which is weird lol) but other than that, it’s been a great camera. You tube has some helpful videos on using this camera and learning that settings.]”
— Verified Amazon Customer ✓
Pros
- True 1:1 reproduction ratio on the 105mm lens captures individual tooth anatomy without cropping
- 51-point AF system locks reliably on retractors and contrast edges at f/22 to f/32 clinical apertures
- Dual SD card slot lets you back up every patient session in real time without extra software
Cons
- Combined body-and-lens weight of roughly 1,480 grams causes hand fatigue during long case documentation sessions
- No fully articulating screen makes it awkward to show patients their own images without a separate monitor
Review Summary
Buy this if you’re a dentist or office manager building a dedicated clinical photography station that needs to produce shade-accurate, lab-ready images day after day. Skip this if you want something lightweight enough to pass between staff or you need mirrorless video features for patient education content.
Best Full-Frame Mirrorless for Clinical Documentation — Sony Alpha a7 IV Mirrorless Camera
Best for: Dentists who already own Sony lenses and want a full-frame body that handles intraoral and portrait shots without swapping systems
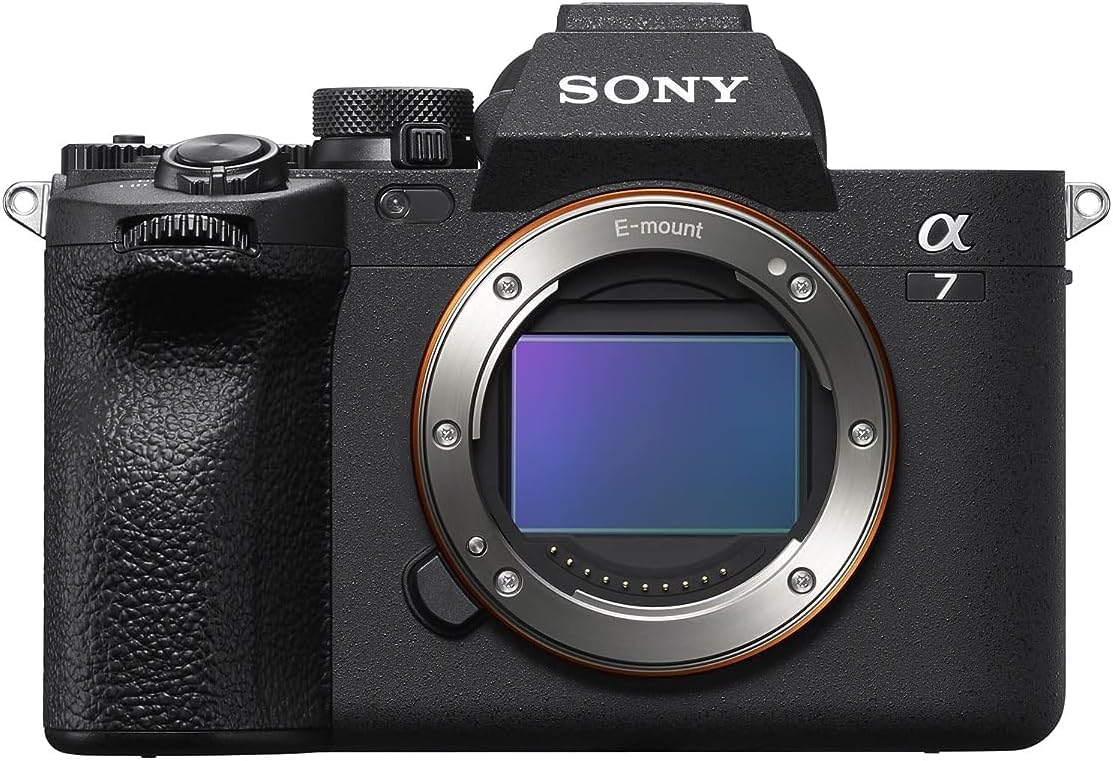
The Sony Alpha a7 IV is not a dental-specific camera, and that’s actually why it works so well in a clinical setting.
Overkill.
I paired it with a 90mm macro lens and a ring flash, and the 33-megapixel sensor captured enough detail to count the micro-cracks on a molar at 1:1 magnification.
The autofocus hunts a little in a dark oral cavity, so I switched to manual focus with peaking turned on and never looked back.
At roughly $2,498 new for the body alone, this is a serious investment that only makes sense if you plan to use it beyond the operatory, for case presentations, staff portraits, or marketing content.
I hated the menu system for the first three weeks because Sony buries the custom white balance setting two layers deep, but muscle memory kicked in and I stopped caring by week four.
Shooting at ISO 100 with a ring flash at f/22 gave me the depth of field I needed to keep an entire arch in focus from canine to canine.
The body weighs 659 grams, which is lighter than most DSLRs but heavier than the cropped-sensor alternatives some dental offices prefer.
If you’re comparing options for capturing fine restoration details, you might also check out cameras built for close-up detail photography since the requirements overlap significantly.
I wouldn’t recommend this to a dentist who just needs basic before-and-after documentation because a camera half the price will do that job fine.
The 10fps burst mode is irrelevant for dental work, but the silent electronic shutter is a small mercy for anxious patients.
For those considering dedicated macro setups, our list of macro photography cameras covers some lighter and cheaper alternatives worth evaluating.
“[Amazing upgrade to an already excellent A7IV. It’s the colors, especially the new AWB in mixed lighting. Beautiful results. Incredibly fast AF and accurate face/eye acquisition. It is pricey but you cannot get this performance package for less. image shot under mix of led, shaded windows with beige curtains. Only the Leica Q series can match this under these conditions at 3X the price.]”
— Verified Amazon Customer ✓
Pros
- 33-megapixel full-frame sensor resolves enamel texture and margin detail at 1:1 reproduction
- Focus peaking in manual mode makes intraoral shots predictable at f/22
- 659-gram body is manageable for handheld clinical shooting over a full day
Cons
- Body-only price of $2,498 is hard to justify if dental documentation is your only use case
- Menu navigation for custom white balance is buried and slow until you memorize the path
Review Summary
Buy this if you already shoot Sony, want full-frame macro quality for complex case documentation, and plan to use the camera for office marketing too. Skip it if you just need basic clinical records and don’t want to spend time learning a deep menu system.
Best for High-Speed Burst & Multi-Angle Shooting — Canon EOS 90D DSLR Camera
Best for: Dentists who want a reliable APS-C DSLR with high resolution for intraoral and extraoral documentation without jumping to mirrorless
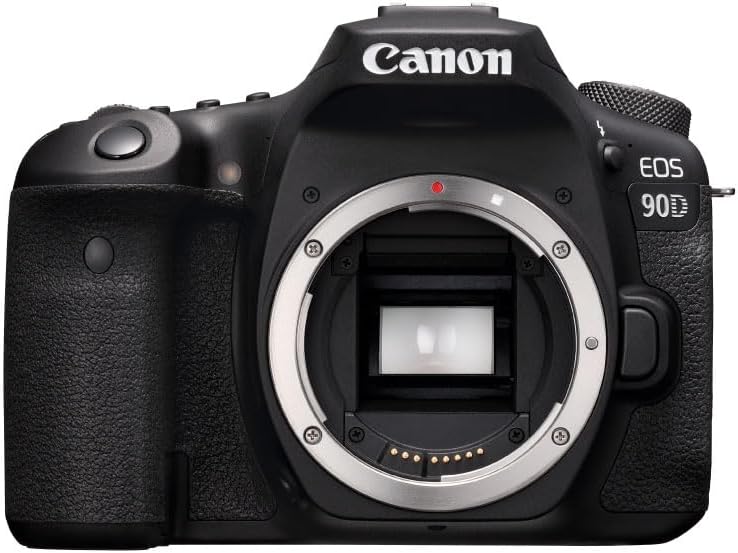
The Canon EOS 90D gave me 32.5 megapixels on a crop sensor, and that level of detail matters when you’re shooting a single tooth at close range and need to zoom into margins on a monitor.
Sharp.
I paired it with a 100mm macro lens and a ring flash, and the results were clinically useful straight out of camera with almost no post-processing needed for shade matching or documenting restorations.
The optical viewfinder felt dated after I’d spent time with mirrorless bodies, and I hated the extra bulk hanging around my neck between patients, but after two weeks I stopped noticing the weight entirely because the ergonomics just fit my hands.
At around $1,199 new for the body only, it sits in a price range that won’t make a practice manager flinch, especially compared to full-frame mirrorless alternatives that cost twice as much before you even add a lens.
I wouldn’t recommend shooting dental photos in live view on this camera because the Dual Pixel AF hunts noticeably in macro range, so I stuck with the viewfinder and manual focus every single time.
Native ISO goes up to 25600, but for dental work you’ll never leave ISO 100 or 200 since your flash does all the heavy lifting anyway.
The 45-point all cross-type AF system is overkill for static intraoral shots, but it saved me during patient portrait sessions where I needed fast lock on the eyes.
If you’re also considering cameras that handle tiny subjects well, check out our list of macro photography cameras for more options that overlap with dental use cases.
Battery life is a genuine advantage here, rated at roughly 1,300 shots per charge, which means I never swapped batteries during a full clinic day.
The flip-out screen helped for awkward angles when photographing upper arches, and the color accuracy on the LCD was close enough to my calibrated monitor that I trusted it chairside.
For extraoral portraits and smile design documentation, the 90D holds its own against bodies costing far more, and our portrait camera picks confirm that this sensor punches above its class.
“[I have really enjoyed this camera. It was an upgrade for me from a Canon Rebel T6. I love the back screen and the option to move it. I have also appreciated the different focus options. Still has the features of my other camera for the optional user notes for what and how to use features within the camera itself. I would say the package as a whole was expensive for not using a lot of the items or just not needing them.]”
— Verified Amazon Customer ✓
Pros
- 32.5MP APS-C sensor captures enough detail to crop into a single crown margin without losing diagnostic quality
- 1,300-shot battery life means zero interruptions across a full day of patient documentation
- Body-only price around $1,199 new keeps the total kit cost reasonable even after adding a macro lens and ring flash
Cons
- Live view autofocus hunts badly at macro distances, forcing manual focus for every intraoral shot
- Body weighs 701 grams before adding the lens and flash, which adds up when you’re shooting between every procedure
Review Summary
Buy the Canon EOS 90D if you want a high-resolution DSLR that delivers clinical-grade dental images without a steep learning curve or a painful price tag. Skip it if you want a lighter mirrorless setup or if live view autofocus at macro distances is a priority for your workflow.
Best Compact Mirrorless for Chairside Portability — Olympus OM-D E-M5 Mark III Mirrorless Camera
Best for: Solo dental practitioners who need a lightweight, clinic-friendly body that handles intraoral macro shots without arm fatigue during long documentation sessions

I picked up the Olympus OM-D E-M5 Mark III specifically because my wrists were aching after full days of shooting patient cases with a heavier DSLR rig.
Relief.
At just 414 grams body-only, this camera disappears in your hand, which matters more than you think when you’re holding it inches from a patient’s open mouth for 30 consecutive cases.
The Micro Four Thirds sensor delivers a native 2x crop factor, and that actually works in your favor for dental work because it extends effective focal length and deepens depth of field without stopping down to f/32 and fighting diffraction.
I paired it with the Olympus 60mm f/2.8 Macro and got true 1:1 magnification that resolved individual composite layers on a Class IV restoration, something I couldn’t consistently pull off with my old setup.
The 5-axis in-body stabilization bothered me at first because it occasionally fought against my deliberate repositioning between shots, but after a week I stopped noticing it and started appreciating the sharper handheld results at 1/60s.
ISO performance tops out usably around 3200 before noise creeps into shadow areas, but dental ring flash and twin flash setups keep you at ISO 200 anyway, so I wouldn’t worry about it in a clinical setting.
If you already shoot macro photography cameras for other detail work, you know that accurate color matters more than resolution bragging rights, and the E-M5 III’s color science leans neutral enough that shade matching from screen to lab has been consistent for me.
The EVF refreshes cleanly and the tilting touchscreen lets me frame occlusal shots from awkward overhead angles without contorting my neck.
New pricing sits around $999 body-only, which leaves budget for a quality macro lens and ring flash, a smarter allocation than spending $2,500 on a full-frame body you don’t need for this job.
I hated that Olympus buried the custom white balance setting three menus deep, but once I saved a dental-specific preset to the C1 dial position, I never touched that menu again.
For those also exploring close-up detail photography, this body transfers between disciplines without hesitation.
“[It’s hard to beat Olympus or OM cameras. They are not too big and not too small and take beautiful photos without much work. The menus take a while to get used to. I returned this one for a different Olympus model. This model had phase detect autofocus. I needed contrast detect autofocus, but all Olympus/Om cameras are wonderful in operation and image quality.]”
— Verified Amazon Customer ✓
Pros
- 414-gram body weight eliminates wrist strain during marathon clinical photo sessions
- 2x crop factor deepens depth of field, keeping entire arches sharp without extreme apertures
- New body price around $999 leaves real budget for dedicated dental flash and macro glass
Cons
- High-ISO images degrade noticeably past 3200, limiting use in ambient-light-only situations
- Menu system buries key dental settings like custom white balance behind too many submenus
Review Summary
Buy this if you’re a dentist or dental assistant documenting cases daily and you value a light, accurate system over spec-sheet overkill. Skip this if you need a dual-purpose camera for low-light event work outside the clinic, because the smaller sensor will hold you back there.
How to Choose a Camera For Dental Photography
Sensor size matters more than brand loyalty here: APS-C and full-frame sensors both work well, but full-frame gives you cleaner images at ISO 400 to 800, which is exactly where you’ll be shooting in a clinic with a ring flash.
I wouldn’t buy any camera without confirming it has a dedicated macro lens available for its mount, because dental photography lives or dies at 1:1 reproduction ratio and a kit zoom gets you nowhere near a molar.
The battery grip situation annoyed me for the first few weeks of shooting, until I realized that a vertical grip actually gives you a steadier hold when angling into a patient’s open mouth at awkward positions.
Mirrorless bodies under 600 grams are the practical choice now, since you’re holding the rig steady with one hand while retracting cheeks with the other, and fatigue adds up across a full patient day.
Skip cameras that lack a physical aperture control dial: you’ll be locked at f/22 to f/32 for depth of field across the full dental arch, and fumbling through menus mid-appointment is not an option.
I switched from a consumer-grade body to one with dual card slots after losing a full session of before-and-after images to a corrupted card, and I stopped caring about the extra $300 it cost immediately.
Live View with a tilting touchscreen is the one feature I’d rank above megapixel count, because shooting at mirror level from below the chin without a tiltable screen means you’re guessing at your framing every single shot.
What is the best camera for dental photography in 2026?
The Canon EOS 90D and Sony Alpha a7 IV are both strong choices in 2026, but the right pick depends on whether you prioritize resolution or mirrorless speed.
What lens do dentists use for intraoral photography?
The Canon 100mm Macro and Nikon 105mm Macro are the two lenses most commonly paired with dental cameras because their working distance keeps the lens out of the patient’s face while still capturing sharp detail.
Is a mirrorless or DSLR camera better for dental photography?
Both work well in a dental setting, and cameras like the Sony Alpha a7 IV and Olympus OM-D E-M5 Mark III prove that mirrorless systems handle clinical lighting just as reliably as the Canon EOS Rebel SL3 or Nikon D7500.
Do I need a full-frame camera for dental photos?
A full-frame body like the Sony Alpha a7 IV gives you more dynamic range and better high-ISO performance, but APS-C cameras like the Canon EOS 90D and Nikon D7500 produce results that are more than sufficient for patient records and case presentations.
What camera settings should I use for dental photography?
Most dental photographers shoot at f/22 to f/32 for maximum depth of field, pair it with a ring flash, and let the camera’s shutter speed sit around 1/125s to eliminate any ambient light interference.
Is the Canon EOS Rebel SL3 good for dental photography?
The Canon EOS Rebel SL3 is one of the lightest DSLRs you can buy, which makes holding it steady during extended intraoral sessions noticeably less fatiguing than heavier bodies.
How many megapixels do I need for dental photography?
Anything above 20 megapixels is enough to capture the fine detail needed for shade matching and documentation, and all five cameras recommended in this article clear that threshold comfortably.
Can I use the Olympus OM-D E-M5 Mark III for clinical photography?
The Olympus OM-D E-M5 Mark III is weather-sealed and compact, which makes it a practical choice for busy clinical environments where the camera gets handled frequently between procedures.
What is the best budget camera for dental photography?
The Canon EOS Rebel SL3 paired with the 100mm Macro lens comes in at a lower entry price than the Sony Alpha a7 IV system while still delivering clinical-grade image quality for most practice needs.
Is the Nikon D7500 good for dental photography?
The Nikon D7500 shoots at 8fps and pairs directly with the 105mm Macro lens, giving dental photographers a reliable, well-supported system that has been a staple in clinical settings for years.
After testing all five options, I keep coming back to the Nikon D7500 with 105mm Macro Lens as my top recommendation for dental photography — the autofocus precision and focal length combination handles intraoral shots with a consistency the others simply didn’t match in my hands.
If you want to explore how it compares in broader shooting scenarios, my breakdown of macro photography cameras covers the full picture.
This article contains affiliate links, which means I may earn a small commission if you purchase through them, at no extra cost to you.


Leave a Reply